

This post is about How to Harvest Aronia melanocarpa Berries. We will talk about harvesting and cleaning aronia and then we will bag them and freeze them for processing in the future. Aronia is ready to be harvested in August and I’m actually harvesting a little later than usual. The best time to harvest aronia is in early to mid-August, not in late August like I’m doing this year.
About Aronia
The Latin name is Aronia melanocarpa and it has a nickname of choke berry because it is so astringent that it makes you want to choke. It is a member of the rose family and is a deciduous cold hardy shrub, which is hardy from zone 8 down to zone 3. It is a native to eastern North America.
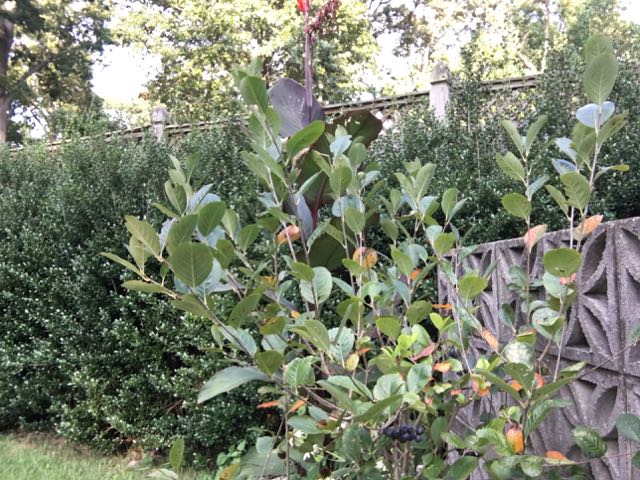
How to Harvest Aronia melanocarpa Berries – The Bush
In late May it has fragrant flowers giving way to fruit that matures in August. The fruit is edible, but is very astringent. Aronia is self-fertile and is pollinated by bees. The Viking variety is a little shorter than some other aronia, only growing 3 to 6 feet high.
Removal from the Shrub
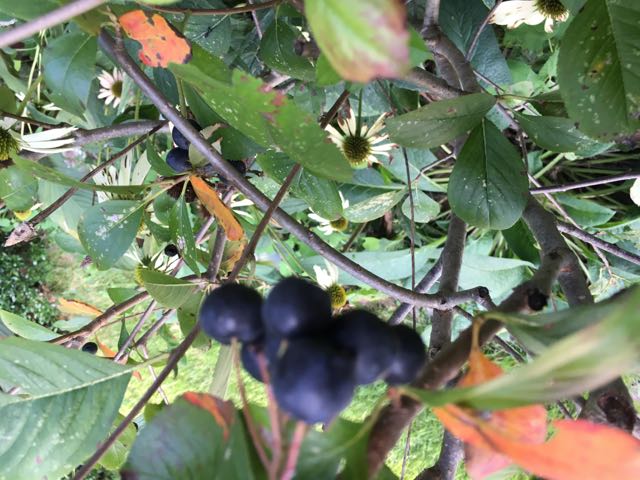
How to Harvest Aronia melanocarpa Berries – Fruit
The first step of the harvest is to remove the berries from the shrub. Cut the cluster of fruit off back where it meets the branch. Then pull off any bugs and put the fruit cluster in a bowl. Do this for all of the fruit on the bush. After all of the fruit has been removed from the shrub, I head in the house for the next step.
How to Harvest Aronia melanocarpa Berries
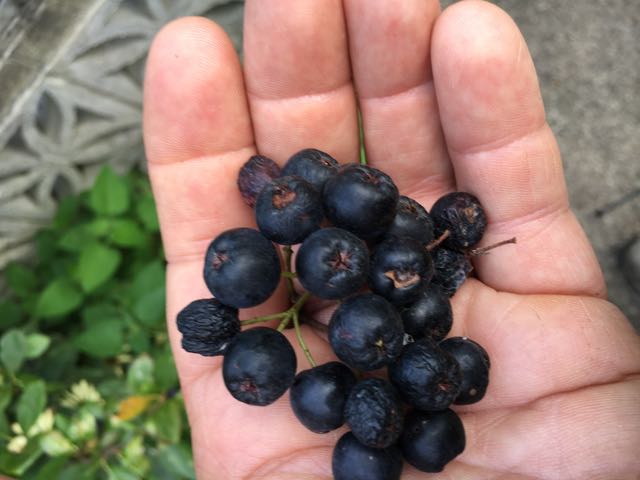
Inspection and Separation
Now I inspect each berry to see if it is usable. Some of them may have over ripened and be shriveled up. Others may have bugs in them. You can tell this by color and holes in the fruit. At this point you separate the individual berries from the cluster.
I put the good fruit in a colander for further processing. I set the bad fruit aside and we will discuss what to do with them in a moment.
Separating the Good from the Bad
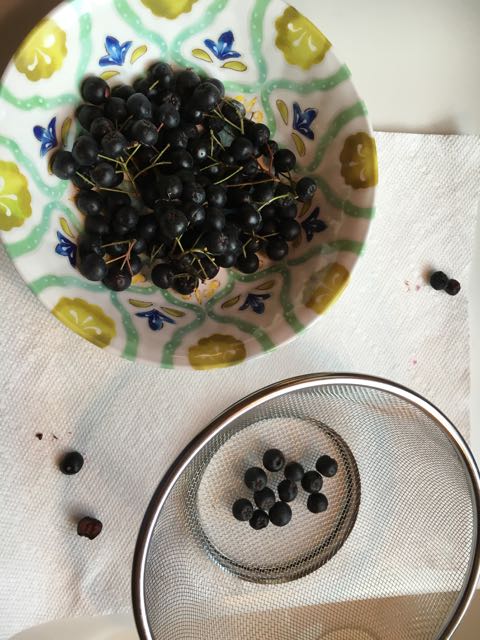
Wash and Dry
Next I wash the berries in the colander. I just run them under some cold water and run my hands through them to loosen anything that is stuck to them.
On the counter I have a paper towel. After washing, I pour the berries on the paper towel and then I take another paper towel and dry them. I do this by laying the second paper towel on top of the berries and gently roll the paper towel on the berries, being careful not to squash the berries. This movement rolls the berries between the paper towels and dries all sides of the berries.
Label and Bag
I now pick the bag I want to freeze the berries in and label the bag with a sharpie marker. I put the name of the fruit that is going into the bag and the date that they are being frozen.
Bag for Freezer
Because I’m freezing them for a month or more, I will double bag them so they don’t get freezer burned. So I put the berries in an UN-labeled bag and then I put that bag in the labeled bag.
Freezing
Now that they have been picked, washed, dried, bagged, and labeled, all that is left is the freezing part. Simply toss them in a freezer until you need them. If you dried them well enough, they will not stick together, so you do not need to flash freeze them.
Processing
You can make a lot of items with aronia. They are a super fruit claimed to be full of antioxidants. Keep an eye out on this blog post for a future article on processing aronia. I’m not sure exactly what I’m going to make yet, but it will likely be something along the lines of syrup that you take once a day for the antioxidant benefit.
Bad Fruit
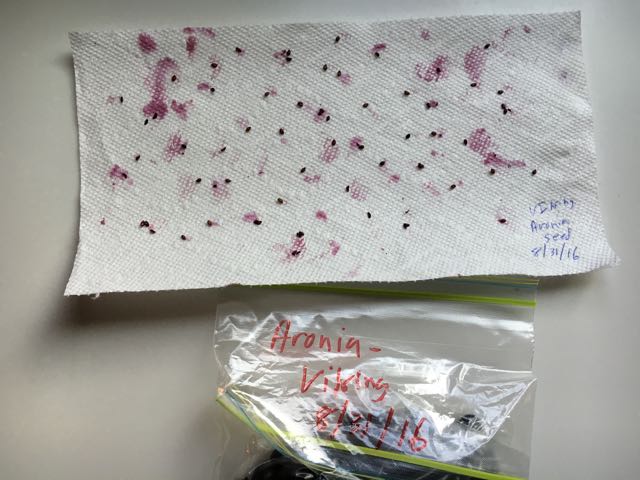
Now let’s talk about the bad fruit that we set aside in a previous step. There is no sense in wasting fruit, even if it is bad. So I save seeds from the over ripe fruit. Each fruit has up to seven seeds.
Planting the Seed
To grow aronia from seed, follow along. Split the fruit open and remove the seeds with your finger nails. Put the seeds on a paper towel and let them dry for a month. Then cold stratify them for three months and plant them.
How to Harvest Aronia melanocarpa Berries – Seed on the Paper Towel
Compost all of the stems and bad fruit pulp not used.
?Want to Help our Small Business Out?
If you shop at Amazon, please go through our site. All you have to do is click the Amazon button on the menu bar at the top of every page on our web site. That link will take you to Amazon and you then shop as you normally do. It does NOT cost you one penny more, but it does help us out! Thank you very much for helping to support our small business!
The Video
Check out our YouTube video on Harvesting Aronia Berries.
Thanks for watching the How to Harvest Aronia melanocarpa Berries post.
Support us by buying plants at Great Escape Nursery or shopping at Amazon by going through our link.
I would suggest making jams with no sugar added, using banana, apple, raisins or pineapple a healthy sweetener.
You cannot benefits from the antioxidant benefits if you make sugar-loaded syrup.
Thank you for the great advice!
I bought a Viking aronia bush about 3 weeks ago. It was not only plantable but harvestable. I harvested approximately 1 quart of berrys. With the berries I made Glam jam (ginger, lime juice and zest, aronia, and maple syrup) I also make the maple syrup each spring. It is pretty tasty.
I am new to your site and blog and am impressed. Thanks for the posts and info.
Thanks for the recipe Jim. I’m glad you like the site and thanks for commenting. I can tell from google analytics that I have a lot of people visiting the site, but not many comments. I appreciate the feedback.